Building a Media Server on a Mac Mini with Plex
20-November-2014
20November
My real intent was getting a small server to run apache along with various VM images to support my development projects. Usage as a media server was really just a happy bonus, and a more tangible reason for buying the server that I could explain to my wife. Although there are cheaper and more powerful machines, the Mac Mini is small and discrete, with low power consumption, and a solid Unix-like OS that’s pre-configured and immediately usable. As such, it’s now comfortably nestled next to my TV, blu-ray player, and network router.
Why a Media Server?
There are several good reasons for setting up a home media server.
- I want to make it easier for my family to share our individual libraries of iTunes videos that we’ve been accumulating. Having our collective libraries available centrally, and easily playable on our television allows us to enjoy our TV shows and movies together as a family - rather than in insolation, crouched over our laptops and iPads as we’d previously done.
- As optical drives disappear from our devices (Macbook Retina, Macbook Air, iPads, Galaxy tablets etc) it's getting harder to watch my existing library of DVDs and blu-ray disks … not that Apple ever supported blu-ray anyway, even though I still think its the best format for purchasing content. Many of my home projects and late night work was done with Babylon 5, a variant of Star Trek or some other TV program/movie playing in the bottom corner of my screen. I’d like to still be able to do this going forward.
Why Plex?
I didn’t know much about media server packages when starting out - although I’d heard of XBMC (now rebranded as Kodi). My initial assumption was that using Apple gear would allow me to simply use iTunes in conjunction with an Apple remote so long as all the members of my family authorised the device with their accounts. However, this assumption was naive - as iTunes just isn’t that smart. It doesn’t handle streaming, and it lacks the “10-foot interface” required for use on a television. It’s impossible to read iTunes on a television screen from the sofa across the room - and it requires a mouse and keyboard which is impractical. Apple used to offer their Front Row home theatre application, but this was dropped back when OS X Lion was released. With a little more research, I settled on Plex. This is closely related to XBMC but the user interface seems friendlier and easier to navigate - which is important since not everyone in my household is tech-savvy, or with the patience to figure things out. Plex also has the advantage of iOS, Android, Mac and Windows clients to allow easy browsing and playback of your video catalogue from these device types. Plex can also be accessed from multiple televisions and blu-ray players so long as they’re network-connected and conform to DLNA (although these devices may potentially still have issues handling some file formats).
Digital Rights Management (DRM)
The downside of Plex is that it doesn’t support direct playback of iTunes-purchased content. Apple’s DRM means that the only things that directly play iTunes video content are iTunes and Apple TV. iTunes’ family sharing feature is also a little complicated and is limited to five devices … which is insufficient since I have four devices, my wife has three, and other family members staying with us have even more.
I’m not a fan of how DRM is being used by manufacturers. Although I generally like Apple gear, I really don’t want to be locked into them forever since there are times when other manufacturers’ gear is technically better, or just better value. For example, my wife and I got rid of our iPhones 18-months ago, being disappointed at Apple dogmatically sticking with a small screen size on the iPhone 5 series (and in frustration at iTunes continuously losing my album art, then losing half my music when I ran the iOS 7 upgrade). I went with the beautifully-designed HTC One, whereas my wife went with the larger Galaxy Note 3. The subsequent iPhone 6 release eventually addressed most of our issues with Apple’s line-up … but it was a year too late and remains expensive. I respect the concept of content providers using DRM to limit piracy, but using that technology as a means to lock my paid content to a specific manufacturer/configuration is a dirty trick. Having to pay again to view the same digital content on a different (but equivalent) device seems unfair. Worse still, there have been instances where paid content has been removed from the iTunes store and has become unavailable for re-download by the customers who purchased it.
Removing the DRM makes things much easier, and DRM can fortunately be removed from iTunes videos with the right product. I opted for M4vgear since this seemed quickest and simplest based on my limited research - although another similar product would presumably be needed if I purchased movies through Google Play. The aim for building my media server was to allow anyone under my roof - including extended family and guests - to view videos on any device (PC/Mac/Android/iOS and DLNA-capable devices) whilst staying in my home. This is the digital equivalent of my old DVD collection, when guests borrowed disks from my DVD shelf - playing them back on their laptops or the TV/DVD players in our lounge plus bedrooms. DRM-removal is needed to achieve this, but remains technically illegal in some jurisdictions. My personal view is that it’s morally acceptable if protecting the rights of consumers to watch content they’ve paid for. Hopefully we’ll soon see the day where DRM is abandoned for video, much as has already occurred with music.
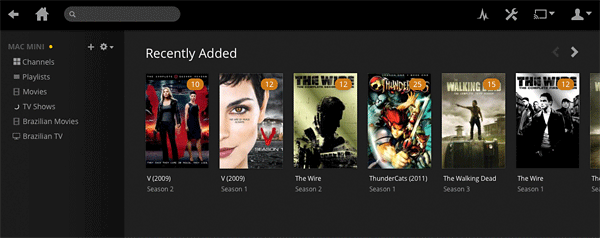
Channels and Internet Streaming
In addition to watching your own media library, Plex provides plug-in channels for watching Internet-based streaming services. There are plugins for watching YouTube videos, news segments with CNN, and Crackle for a small selection of (mostly very old) movies and TV shows. There’s actually a wide range of plugins, but most are suited only to US-based users. I found that that plugins for the Australian-based streaming services I’m most interested in such as ABC iView, SBS On-Demand, and catch-up services from our other commercial channels currently remain unavailable despite discussion on various forums mentioning them. Fortunately I already have on-demand streaming for these available through the Sony blu-ray player connected to my lounge TV ,and apps installed on my iPad. Nonetheless, it would be nice if these channels were made available through Plex in future, since leveraging an existing (proven and free) platform would be easier and cheaper for Australian providers than building their own separate proprietary platforms across multiple device types for digital streaming.
Plex Pass
Although the Plex media server is free, Plex offers an additional subscription service called Plex Pass, which adds extra features - such as managed access (e.g. for age-restricted material), synching media files to your device so that you can view them offline (useful if travelling away from home), stream media files from cloud-based locations such as Dropbox, and access trailers and other extras for your movies and TV shows. At this stage, none of these are features that I’m using - hence the subscription is something that I’ll forego for now.
Installing Plex onto your Mac Mini (Server and Home Theater)
Plex’s installation is very quick and simple. It’s really just a matter of going to the Plex.tv downloads website and downloading the appropriate zip files. Once unzipped, these just need to be dragged across into the application folder of the computer you plan to use as your server.
There are TWO apps to be downloaded:

Plex Media Server: This is the server process which scans the available media files, and associated
information (such as program or movie details imported from thetvdb.com or imdb.com),
and responds to streaming requests from clients.

Plex Home Theater: This provides the “10-foot” user interface allowing you to browse through lists of available
videos, looking at program information and other details. It also provides the capability to play back various video formats such
as .avi, .mpg, .m4v, .flv, .etc
With both files installed into your Applications folder, start the Plex Media Server. This may initially show a warning message about it being a downloaded application, and potentially other subsequent firewall-related messages.
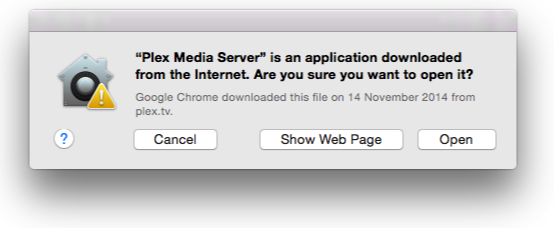
Select Open
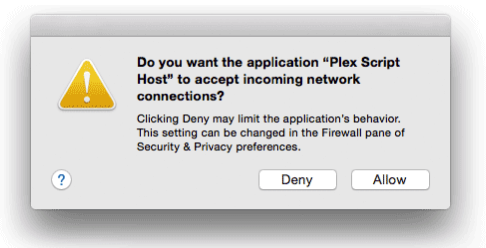
Choose Allow
If you accept this you should soon see a new icon in the menubar along the top of your desktop screen, although this may take a couple of minutes to start up as it prepares things on your system.
Configuring Your Media Server
Plex automatically launches your browser first time when you open the Media Server. This displays the usual End User License Agreement. Once you accept this, you’ll be able to configure the server to scan specified directories containing your media files.
You can return to Plex’s browser-based menu at any time by clicking on the Plex icon in the menu bar, and choosing Media Manager then Settings (icon in the top-right corner of the browser screen).
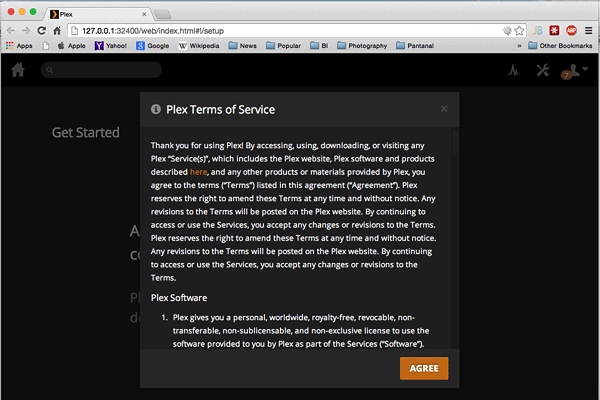
The standard licence agreement is displayed and must be accepted.
Review clauses agreeing to:
Review clauses agreeing to:
- Name your first-born “Plex”, and
- Sign over the deed to your Grandmother’s house.
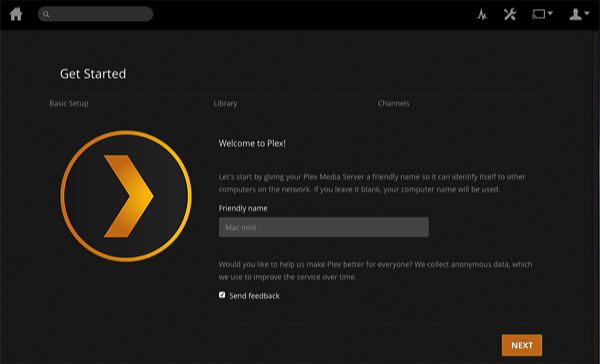
Enter the Friendly Name for your Plex Server.
- This is the media server name displayed to your Plex and DLNA clients.
- It’s useful if you have multiple servers.
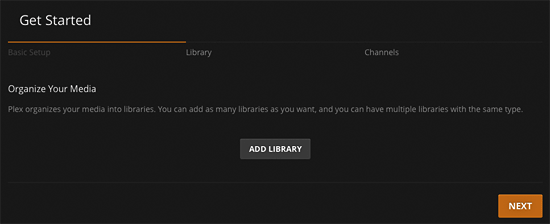
Structure your media files into Libraries. You can have as many libraries as you want - but the media files for each library need to be split into separate folders.
Choose Add Library
Choose Add Library
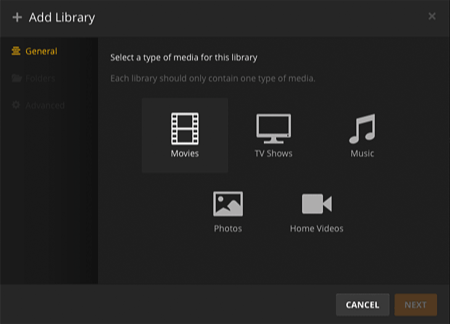
Specify a Media Type for the new Library. It’s important to choose the correct type as this governs the file naming standard, and the source Plex uses to obtain information about your media content.
Library types are:
Library types are:
- Movie
- TV Show
- Home Videos
- Music
- Photos
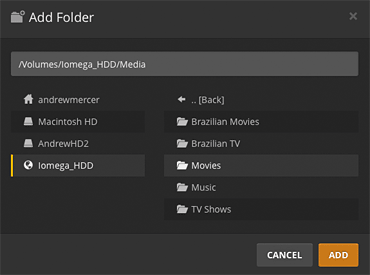
Specify the folder containing the media files for the new Library.
Click Add
Click Add
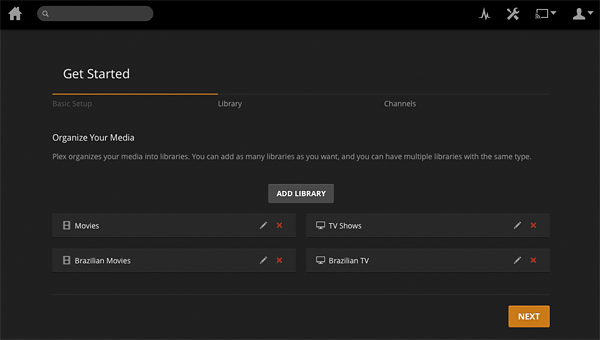
Each new library will take several minutes to scan depending on the content. Repeat the process, adding as many libraries as you want.
When finished, choose Next
When finished, choose Next
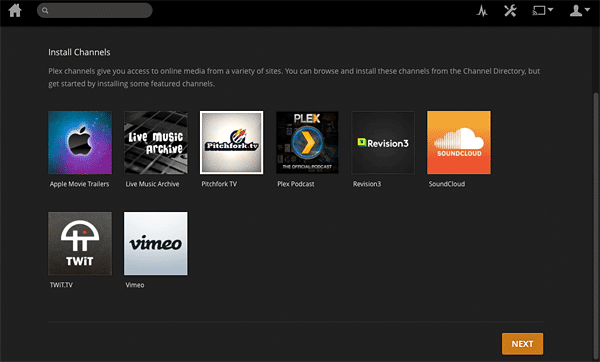
The final step lets you add Channels for internet streaming.
- The wizard only shows a small selection.
- It’s generally easier to click Next, and add them later.
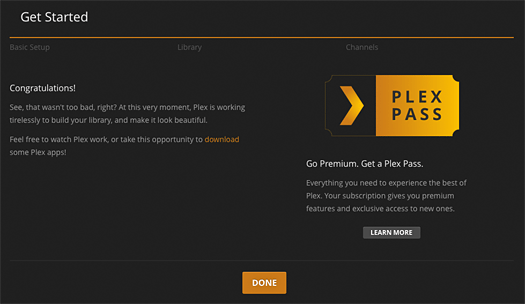
Congratulations!
Your setup is complete.
There’s no need to sign up for Plex Pass right now - although its something you might consider in future if you really want the extra features.
Click Done to exit.
Your setup is complete.
There’s no need to sign up for Plex Pass right now - although its something you might consider in future if you really want the extra features.
Click Done to exit.
This takes you to the Media Manager. You can add further libraries by clicking on the + symbol on the left-hand panel. You can also add channels and modify the existing libraries.
Media scans and server parameters can be set by choosing the Settings icon on the top-right.
Media scans and server parameters can be set by choosing the Settings icon on the top-right.
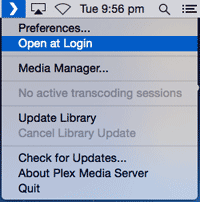
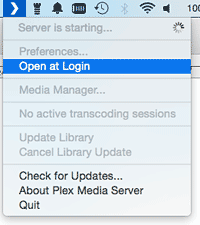
Select the Open at Login option on the toolbar menu. This will automatically start Plex each time you login.
Recognising Your Media Files
Although the library and media file locations were specified in the setup process above, its common to find that Plex hasn’t recognised your media files. This is because Plex looks for specific prefixes and naming standards.
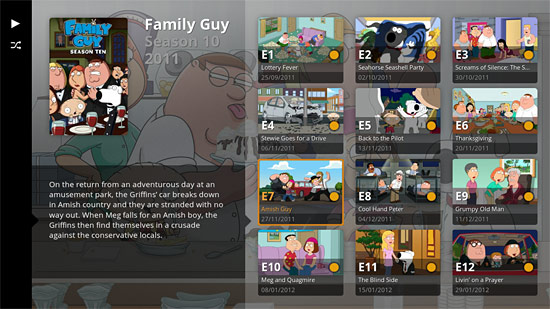
- Successful recognition will allow Plex to match the file with other Internet-based sources, automatically downloading artwork and program information which get displayed for users browsing for media catalogue.
- In many cases this requires going through your media files, manually renaming/reorganising them as needed. This is tedious if you have a lot of files - but is worth the effort. It makes your media library accessible and easy to navigate via the Plex front-end software.
TV Shows
Metadata Source:
File Name Format:
/Show_Name

   /Season XX

      ShowName - sXXeYY - Optional_Info.ext
Example:
/Heroes

   /Season 01

      Heroes - s01e01.avi

      Heroes - s01e02 - The Coming Storm.avi

      Heroes - s01e03.mp4

   /Season 02

      Heroes - s02e01.avi

      Heroes - s02e02.mkv

      Heroes - s02e03.m4v
The lookup to TheTVdb.com is important when naming your TV Shows - and you should visit the website to get the correct variation of the show’s name.
For example:
- It’s
Magnum, P.I.
- not
Magnum PI
For example:
Battlestar Galactica
vs.Battlestar Galactica (2003)
Doctor Who
vs.Doctor Who (2005)
Notably, Doctor Who (2005) with all its special episodes (Christmas and other specials) is notoriously difficult to match and will require close attention to the episode numbering on the TheTVdb.com site. For further information, refer to the Plex webpage on Naming 'Series' & 'Season' Based TV Shows.
The equivalent naming standard for Movies is outlined below:
Movies
Metadata Source:
File Name Format:
/Movie_Name (release year)

    Movie_Name (release year).ext
Example:
/Avatar (2009)

    Avatar (2009).mkv

/Batman Begins (2005)

    Batman Begins (2005).mp4

    Batman Begins (2005).eng.srt

    poster.jpg
In a similar fashion to the TV Show naming convention, the lookup to imdb.com is important to get the proper name variation and release year. You don’t necessarily need to put each movie into it’s own subfolder - but it’s the best option if you have additional related files such as subtitles and artwork. More information about the naming standard is available on the Plex webpage Naming Movie Files.
Adding Subtitles
Plex gives you the option to include subtitles. Aside from foreign language films, this is useful for guests and members of my household for whom English is a second language - or when watching movies late at night when I need the volume turned down low.
Subtitles are supported in several different formats including SSI, SSA (or ASS), and SRT. The most common format is SRT (SubRip) - which is essentially just a text file with time codes to synch the subtitles with the video track. Film and TV subtitles can often be downloaded from the OpenSubtitles.org website, but this can be hit and miss because there are many versions of the same film - and things such as an extra producer’s credit at the beginning of the DVD you’ve ripped can put the entire thing out of synch. Because of the SRT file is editable, you can potentially change the time codes manually - but it’s tedious. There are software tools that allow you rip the subtitles at that same time as you rip the disk, but these require configuration and practice. They essentially use optical character recognition to read the bitmap text images, and convert it to editable text.
Nonetheless - if you manage to obtain the correct SRT file, you can link it to your movie or TV show by placing the subtitle file into the same folder as your video and naming it appropriately. You’ll also need to open the Media Manager browser screen on your media server, choose Settings, then Agents - ensuring that the Enable Local Assets option is selected for the appropriate Library type.
Refer to the Plex webpage on Adding Local Subtitles to Your Media.
Installing your Plex Clients (iOS, Android, Mac, Windows)
The above steps have covered the setup of your media server. The remaining step is to set up the Plex clients so that you can access the media server from your devices and browse/play the content. In most cases this is just a matter of going to the App Store appropriate for your device, and then downloading the app. Note that these are Paid Apps - and generally cost around $6. It’s a small cost for convenience.
Alternatively, because Plex is DLNA-compliant, you or your guests may potentially already have compatible players installed - although these won’t have access to extra features such as the movie and TV episode summaries displayed in the Plex client.
Plex Home Theater client
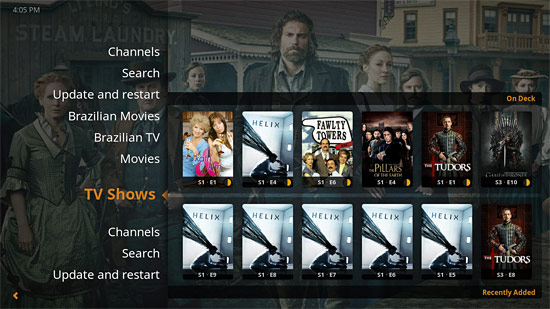
This is the client software for Mac computers (with Windows and Linux versions also available). This is ideally what you run on the computer connected to your television via the HDMI cable.
- The user interface is a true “10-foot user interface” that works great when browsing catalogue items from your sofa across the room.
- If the default text size is too small, this can be easily increased via the settings menu.
PlexMini Client (Mac only) and VLC Player
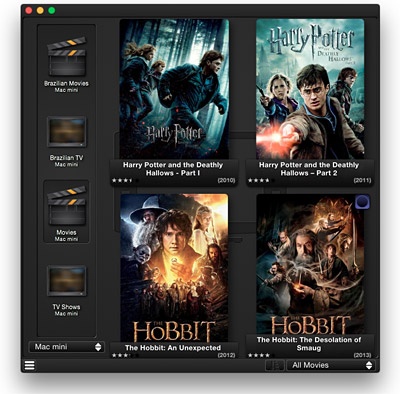 The Home Theater client is also the client which Plex suggest be used with other computers connected to your home network. But personally, I find this arrangement clunky since the interface and playback is fullscreen only - and the navigation is via the cursor and escape keys which just isn’t intuitive for most computer users. Additionally, when watching videos on my computer, I’m usually also doing other things - meaning that I prefer to opt for a small video window in the corner of my laptop screen. As such, there are two alternative options to consider.
PlexMini Client (Mac only): This is an almost perfect alternative to the Plex Home Theater client for playback on computer screens. Although it shows great promise, it’s still an unofficial (i.e. non-Plex) product in beta. It allows access to your Plex media server and program descriptions with the advantage of mouse support and resizable windows. This is a great improvement on Plex Home Theater, but there are still limitations on how small the video window can be resized, and there’s no float-on-top option. Hence, this still isn’t quite there if you’re looking for something to play your videos in a corner of the screen while you surf the web or work on other things.
The PlexMini Client can be downloaded from:
https://3v.io/projects/plexmini
VLC Player: This works - but requires you to bypass Plex entirely. VLC Player is probably the most popular, robust, and versatile of the independently-developed video applications - since it supports almost all video formats. In theory, it should also be able to connect to your Plex Media Server thanks to it’s uPNP support. However, this seems very flakey (on the Mac version, at least). Downloading a list of available videos is painfully slow and frequently results in crashes. The workaround is simply to share the folder on your server containing your video files. This allows VLC Player to read and playback the files directly from the shared drive. This doesn’t give you the user-friendly catalogue or program information - but at least you can playback the videos in a convenient resizable window.
VLC Player can be downloaded from:
http://www.videolan.org
iOS Client(s)
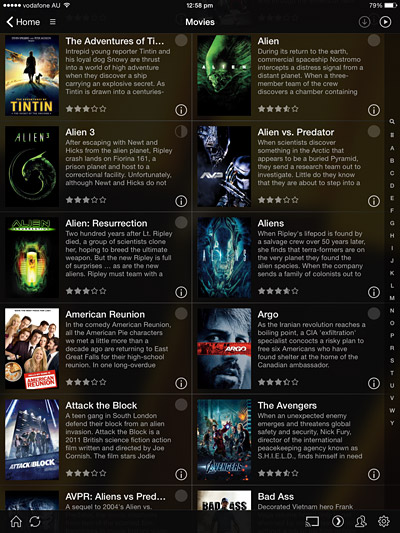 The ability to view videos on iPads and iPhones is convenient. This allows you to continue watching your video no matter where you are in the house - e.g. in the kitchen, or late at night in bed (with headphones so that you don’t disturb others next to you). Fortunately the Plex client for iOS is a joy to use. You can easily browse the catalogue and associated program information, and watch videos … restarting from the point where you left off if moving between devices. The user interface is intuitive and the software seems very stable.
 If you’ve invested in the additional Plex Pass membership, additional features are opened up where multiple users in your household can track their place in the TV programs and movies that they’re watching - plus they can synch the content to their mobile devices so they can continue watching media content on their local device when away from home. This later feature is useful if you have a long commute or if travelling away on work for a few days.
The Plex iOS client is a paid app costing around $6 from the Apple AppStore.
Plex’s DLNA-compliance also allows other iOS clients to be used such as Media:connect. At $8, it’s more expensive than the Plex client, less user-friendly and lacks plex-specific features displaying detailed program information. However, this app was already installed on my iPad following my experimentation with an alternative Media Server package a couple of years ago - and it was good seeing that Plex’s DLNA-compliance means that the app is compatible. I can’t vouch for it supporting all formats, but Media:connect has the advantage being generic and having a built-in downloader allowing you to download and view your content off-line without having to the pay for the Plex Pass.
Android Client
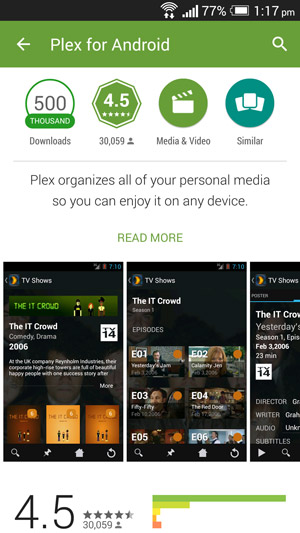 Plex’s client for Android has the same look and features as its iOS cousin, and is similarly priced on the Google Play store (and in the Amazon AppStore for their devices).
Although we’ve installed the Android client onto our (HTC One and Galaxy Note 3) and they seem to function smoothly, we honestly haven’t yet used them much for watching videos aside from some quick post-installation testing. This is due simply to the fact that our Android devices have smaller screen sizes that our TV/computers/iPads - and therefore they aren’t our first (or even second) choice for watching videos. Of course, in the event that we have family or other guests with Android-based tablets coming to stay for a while, it’s good to know that the appropriate software is readily available.
Windows Client
Given that I don’t have a Windows-based phone or tablet, this isn’t anything that I’ve yet been able to test. However, in the event that someone in my family ever does get such a device then there’s an appropriate version of the Plex client (both Windows 8 and Windows Phone) in the Microsoft AppStore.
Xbox, Playstation, Chromecast and Other Clients
Client software is available for an ever-increasing range of other devices. These are generally the types of network-connected-device plugged into televisions in bedrooms, and which can browse and playback content from a Plex Media Server installed elsewhere on your home network. These are available from the Plex downloads website. However, even if there isn’t a download available for your specific device (e.g. Smart Televisions and Blu-ray players), these will likely still work with Plex if they’re network-connected and are compliant with DLNA
Fix for Apple Remote issue
As an aside, if you’ve installed Plex onto a Mac Mini, and are using a Apple Remote to browse and select your media content, you may potentially encounter a weird issue involving the auto-launch of iTunes.
In my case, I got a brand new Apple Remote and followed the instructions to pair it with the new Mac Mini. All seemed fine until I noticed that some button pushes on the remote triggered changes in the volume settings on my Macbook Pro - and caused iTunes to launch and start playing music tracks. The pairing of the Apple Remote with my Macbook Pro was wholly unexpected given that the Macbook Pro doesn’t have an infrared receiver, and the fact that iTunes was launching on it even when my Macbook was in another nearby room and in sleep mode (with the clamshell case closed).
Research in the Apple support and other forums revealed that this wasn’t an unknown issue.
- There were suggestions to check iTunes preferences to verify that it wasn’t associated with any remotes and to disable the iTunesHelper utility that starts on login - but neither of these resolved my problem.
- Further discussions highlighted that this was a known issue reported to Apple as far back as 2009, and which to date still remains unresolved by Apple.
Notably, there are downsides to installing unofficial non Apple-supported OS patches onto your computer.
- The obvious issue is that they're not Apple-supported, and that they may unexpectedly break features on your computer. For example, turning off the iTunes auto-launch for the Apple Remote will likely impact the iTunes auto-launch for other accessories (e.g. headphones).
- The patch will probably stop functioning next time you update your computer and the Apple-default version is reinstalled or changed. This will likely occur for me when the successor to Yosemite is launched. Re-applying the patch mightn't work, and it may be that I'll then be waiting on a newer version from the developer.
- Trust. Although I'll generally trust patches and updates from Apple, I'm more cautious about installing software and updates from developers that I don't know. In this case I needed to make a call, and accept the risk. In his favour, the developer has been actively providing support for the patch, responding to queries, and has made updates over the course of multiple OS X releases. This, along with positive user feedback, issue tracking via GitHub, and my own quick review of the script gave me sufficient confidence in the legitimacy of the patch to apply it to my system.
- Complexity. Although the installation process is well-documented and scripted, it requires that Apple's Xcode development environment and Command Line Tools have already been installed (free, but a big download), and for users to build the patch via a script executed in Mac Terminal. This isn't hard but can be daunting to a non-technical Mac user.
http://www.thebitguru.com/projects/iTunesPatch

Andrew Mercer
I'm a Business Intelligence and Data Warehousing consultant based in Brisbane, Australia. I've consulted on or managed several large BI systems in New Zealand, Australia and Latin America.

Contact Info
Please use the contact form on this site.
Or phone 04 5704 1640 (Australia)
Or phone 04 5704 1640 (Australia)
Navigation
Photos
Latest Articles

blog comments powered by Disqus