
Oracle Instant Client and TNS on a Mac
24-January-2015
24January
Downloading the install packages from the Oracle Instant Client download site is the first step. However, rather than a single install, you get a choice of library files and versions.
- You should always start with the latest version. The only reason that I can think of going for an older version is in the event of a known incompatibility (admittedly, there are none that I know of)
- Choose the 64-bit variant. This should work fine unless you’re using an old (pre-2007) Mac. All recent versions of OS X are 64-bit, with support for older 32-bit apps likely to diminish. If you’re using an older Mac, here are the instructions to check whether you have a 32 or 64-bit chip.
Instant Client - Basic
All files required to run OCI, OCCI, and JDBC-OCI applications
All files required to run OCI, OCCI, and JDBC-OCI applications
instantclient-basic-11.2.0.4.0-macosx-x64.zip
Instant Client - SQL*Plus
Additional libraries and executable for running SQL*Plus with Instant Client
Additional libraries and executable for running SQL*Plus with Instant Client
instantclient-sqlplus-11.2.0.4.0-macosx-x64.zip
Instant Client - SDK
Additional header files and an example makefile for developing Oracle applications with Instant Client.
Not essential for basic usage - but essential if attempting connections to an Oracle database via PHP - requiring you to build an OCI8 library. It’s a recommended install even if you don’t need it immediately.
instantclient-sdk-11.2.0.4.0-macosx-x64.zip
Step 1: Where to install the Files
Opinions differ about the best location for installing the downloaded files.
In practice you can install the Oracle instant client files anywhere on your file system so long as the PATH environment variable is updated to include that directory in the search path
- Some install instructions suggest copying the install files into the directories:
/usr/lib
or/usr/bin
This works - but is best avoided. My concern with this approach is that these are the default locations for OS X libraries and commands. Copying in non-standard items gets messy when things go wrong - complicating the process to diagnose and fix issues because of the difficulty identifying which items should (and shouldn’t) be there. If you upgrade Instant Client in future, copying in the new version’s files over top may result in a mixture of old/new libraries which triggers unexpected behaviour. However, if you have issues defining environmental variables then this may be your only choice.
- In Oracle’s installation example, they’ve created a directory:
/opt/oracle/instantclient_11_2
This gives you a separate (clearly specified) directory for your Instant Client files. It’s also good choice as/opt
is the base directory favoured for non-standard (i.e. optional) software installs in Unix operating systems …but it’s just not commonly used in Mac circles.
- My preferred option is:
/Library/Oracle/instantclient_11_2
This has the advantage of the choice above - but is a more Mac-like alternative. This is the directory I’ll specify for these instructions going forward (but feel free to use whichever location you think is most appropriate for you).
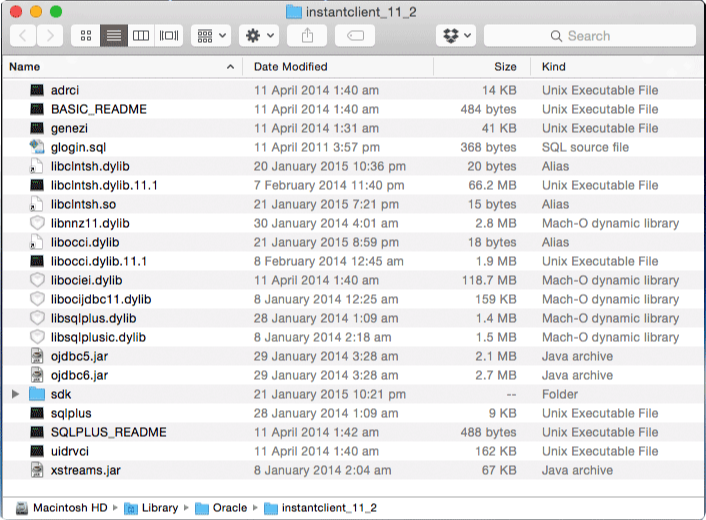
- Extract instantclient-basic and instantclient-plus zip files into single folder (e.g. /Library/Oracle/instantclient_11_2), then
- Create a subfolder named “sdk” inside that folder, and extract instantclient-sdk into it.
Open Mac Terminal. Change to the directory you created, add a symbolic link, and create a network/admin subdirectory (which we’ll later use for our tnsnames.ora file):
cd /Library/Oracle/instantclient_11_2
ln -s libclntsh.dylib.11.1 libclntsh.dylib
mkdir network
mkdir network/admin
Step 2: Defining an ORACLE_HOME and Environmental Variables
Getting Instant Client to function depends on correctly setting up the required environmental variables.These allow the Oracle client to find the files and library routines it needs when required.
You’ll need the following environment variables configured:
- PATH
- CLASSPATH
- DYLD_LIBRARY_PATH
- ORACLE_HOME
- TNS_ADMIN
/etc/launchd.conffile - however, this method no longer works. The workaround is to set these variable in the
.bash_profilefile associated with your login.
Open Mac Terminal. Move to your home directory (~) and look to see if there’s an existing
.bash_profilefile. If there is, use the
morecommand to display it’s content.
andrew$ cd ~
andrew$ ls .bash_profile
.bash_profile
andrew$ more .bash_profile
export PATH=/usr/local/bin:$PATH
- The
cd ~
command takes you to the home directory for your user.
- The
ls .bash_profile
command checks to see if there’s an existing file
- The command
more .bash_file
displays the contents of the file.
If your user account doesn’t have an existing file then a new empty file can be created using the
touchcommand below. Note that you’ll be asked for the root password since the
sudocommand is requesting root permissions
sudo touch ~/.bash_profile
Once the file exists, you can load it into your favourite text editor to configure the environmental variables you need for Oracle Instant Client. The
editcommand will open the file in your default GUI-based text editor such as TextEdit or TextWrangler. Note that other command-line based editors such as
nanoor
vimcan also be used (as per the information box at the end of this article).
edit .bash_profile
Update the .bash_profile content to add the new Oracle instant client directory in your PATH variable, and set the other new variables are required. Remember that the specified directory should be the location of the Oracle instant client files that you installed above (i.e. if you’ve used a different location then specify that instead).
The resulting file should look something like that below:
The resulting file should look something like that below:
export PATH=$PATH:/usr/local/bin:/Library/Oracle/instantclient_11_2
export ORACLE_HOME=/Library/Oracle
export DYLD_LIBRARY_PATH=/Library/Oracle/instantclient_11_2
export TNS_ADMIN=/Library/Oracle/instantclient_11_2/network/admin
export CLASSPATH=$CLASSPATH:$ORACLE_HOME
export NLS_LANG="English_Australia.UTF8"
The last item, the NLS_LANG environmental variable, helps specify the language and behaviour (i.e. display of dates and numbers) of your Oracle applications, and should be set to a value appropriate for your region.
Save the updated file when complete.
The
Potentially you may already have tnsnames.ora file installed - or might have one provided for you by a system administrator. Even so, you need to ensure that its accessible by locating it in the directory you specified in the TNS_ADMIN variable above. Traditionally (or at least in the Windows world) the file has been located in a network/admin directory underneath the ORACLE_HOME. You don’t necessarily need to keep with this tradition - but you should still make sure that the location can be found.
If you don’t have an existing tnsnames.ora file, you can create one using the same method we used for the .bash_profile file in step 2 above.
Save the updated file when complete.
Step 3: Creating a TNSNAMES.ORA File
The
tnsnames.orafile specifies connection details for databases in your environment. It contains database names, server names/addresses and port. Although not so critical in a home environment where you’ll likely only have one or two databases - it’s useful in the corporate world where there are potentially dozens of different systems available to connect to.
Potentially you may already have tnsnames.ora file installed - or might have one provided for you by a system administrator. Even so, you need to ensure that its accessible by locating it in the directory you specified in the TNS_ADMIN variable above. Traditionally (or at least in the Windows world) the file has been located in a network/admin directory underneath the ORACLE_HOME. You don’t necessarily need to keep with this tradition - but you should still make sure that the location can be found.
If you don’t have an existing tnsnames.ora file, you can create one using the same method we used for the .bash_profile file in step 2 above.
cd /Library/Oracle/instantclient_11_2/network/admin
sudo touch tnsnames.ora
sudo edit tnsnames.ora
Note that we prefixed the
editcommand with
sudosince this helps ensure that the file (and edits) are owned by your system’s root user. The format of the tnsnames.ora content is below.
ORCL =
(DESCRIPTION =
(ADDRESS = (PROTOCOL = TCP)(HOST = hostname)(PORT = portnumber))
(CONNECT_DATA =
(SERVER = DEDICATED)
(SERVICE_NAME = SID)
)
)
This lets you specify the database name, host, listener port and SID/Service Name. Just repeat the code block for each database that you wish to specify and connect to.
Example:
Example:
ORCL =
(DESCRIPTION =
(ADDRESS = (PROTOCOL = TCP)(HOST = ODIGettingStarted)(PORT = 1521))
(CONNECT_DATA =
(SERVICE_NAME = ORCL)
)
)
Step 4: Setting Permissions for ORACLE_HOME
We now need to specify permissions for the ORACLE_HOME director created in step 1, and referred to by our environmental variables in Step 2. To do this, enter the commands below - modifying the commands as necessary to specify the ORACLE_HOME directory path as per your system.
sudo chgrp –R wheel /Library/Oracle
sudo chmod –R 755 /Library/Oracle
- The first command sets the group ownership of the Oracle directories and their contents - linking them to the “wheel” group (i.e. root user and anyone with
su
privileges.)
- The second command changes the privileges to read, write and execute the Oracle contents.
Step 5: Reboot and Test
Although the changes are now complete, you’ll need to restart your Mac for them to take effect.
After the restart, open a terminal window and enter the
envcommand to display the environmental variables for your system. Hopefully these should be consistent with those you set in step 2 above.

You should now (we hope) also be able to get a successful connection to your Oracle databases through SQLplus and (if installed) Oracle SQL Developer.
References
References
- Daniel Norwood - Connecting to Oracle with Toad. Although specifically written for Toad users, this article contains great general advice on the setup of Oracle instant client.
- Enavigo - Enabling Oracle OCI8 PHP Extension on OS X Snow Leopard. Although out of date, it provides a good overview - including why installing the SDK is useful. However, this article’s recommendation to copy Instant Client files into /usr/bin and /usr/lib is best avoided IMHO.
Text Editing Tools
When editing configuration files in Mac Terminal, there’s a choice of text editors - with most users having their own preference. Just entering the
editcommand to launch your default GUI editor such as TextEdit or TextWrangler (if installed) is the easiest option for new users. However, many users have a strong preference for other editors such as nano and vim.
Nano
This is a simple text editor included with OS X, and can be started simply by entering
nano filenameat the command prompt. This is a good choice for infrequent users, as common commands such as Save and Exit are clearly displayed at the bottom of the screen. This means there’s no struggle to remember obscure command sequences.
If using
nano
- move the file using your cursor keys. You’ll be able to make your edits simply by typing
- to save your file: press
Control+O
- to exit: press
Control+X
Vim
This is a variation of vi - a text editor from the Unix-world that’s almost universally available. It’s commands are more obscure - but the fact that its almost universal makes it a favourite for developers and IT professionals the world over. It means that the text editing commands they learn on one platform are readily transferable and that its the only editor they need to remember. Vi (and vim) are really quite powerful and full-featured … if you know how to use them.
If using
vim
- move the cursor to the point in the file where you want to add/change things, then
- press the
I
key to switch to insert-mode. - when finished, press the
Esc
key to return to command-mode, - To save, press
:wq
(write and quit). To exit without saving, press:q

Andrew Mercer
I'm a Business Intelligence and Data Warehousing consultant based in Brisbane, Australia. I've consulted on or managed several large BI systems in New Zealand, Australia and Latin America.

Contact Info
Please use the contact form on this site.
Or phone 04 5704 1640 (Australia)
Or phone 04 5704 1640 (Australia)
Navigation
Photos
Latest Articles

blog comments powered by Disqus